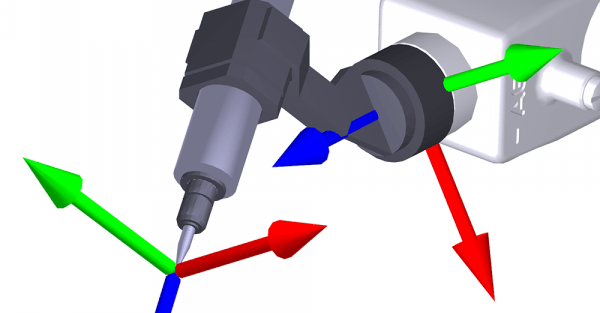
Describing a 2D rotation takes one number: the angle. Describing a 3D rotation is far harder. Euler angles are intuitive but suffer from gimbal lock, a singularity where two axes align and the system loses a degree of freedom, which is exactly the bug that caused Apollo-era navigation headaches and still crashes drone control loops today. Rotation matrices avoid gimbal lock entirely but require careful composition order, because 3D rotations do not commute (rotating X then Y gives a different result than Y then X). In this lesson you will work through every major 3D rotation representation: coordinate axis rotations, Euler angle sequences, the Rodrigues formula for arbitrary axis rotation, and 4x4 homogeneous transformations, applied to robotic welding, drone gimbals, and satellite attitude control. #3DRotations #EulerAngles #GimbalLock
Learning Objectives
By the end of this lesson, you will be able to:
Construct rotation matrices for rotations about coordinate axes and arbitrary vectors
Apply Euler angle sequences for systematic 3D orientation representation
Compose 4×4 homogeneous transformation matrices for unified spatial motion
Real-World Engineering Challenge: 3D Spatial Orientation Control
Spatial orientation control is fundamental across robotics, aerospace, computer graphics, and automation. From industrial robots manipulating parts with precise tool angles, to spacecraft maintaining attitude in orbit, to animation systems rotating 3D models - all require mathematical frameworks for representing and composing 3D rotations and transformations.
Engineering Question: How do we mathematically represent and compose complex 3D orientations in a systematic way that handles singularities and works across diverse applications?
Why 3D Spatial Mathematics Matters
Consequences of Poor Mathematical Foundation:
Orientation errors from incorrect rotation sequences or coordinate confusion
Gimbal lock causing loss of degrees of freedom at singular configurations
Numerical instability from poorly conditioned transformations
Programming complexity without systematic transformation framework
Limited scalability to more complex multi-body or hierarchical systems
Benefits of Systematic 3D Analysis:
Precise orientation control using robust mathematical representations
Predictable behavior through systematic matrix composition rules
Singularity awareness enabling detection and avoidance strategies
Unified framework applicable across robotics, aerospace, and graphics
Foundation for advanced topics (quaternions, screws, differential kinematics)
Fundamental Theory: 3D Rotation Mathematics
Basic Rotation Matrices About Coordinate Axes
3D rotations are more complex than 2D because rotation order matters and multiple representations exist. Basic rotations about coordinate axes provide the building blocks for all spatial orientations. Following the established axis convention where counterclockwise rotation is positive, we can derive rotation matrices for each coordinate axis. Each rotation transforms a mobile frame (A, B, C) relative to a fixed frame (X, Y, Z).
Physical Meaning: Rotation about X-axis corresponds to “roll” motion - like an aircraft banking left or right. Rotates vectors around the X-axis, leaving X-coordinates unchanged while rotating Y and Z components in the YZ-plane.
Rotation about Y-axis by angle β:
Geometric Analysis:
After rotating axis A:
After rotating axis C:
Transformation Summary:
Before
After
A(1,0,0)
A(cos β, 0, -sin β)
B(0,1,0)
B(0,1,0)
C(0,0,1)
C(sin β, 0, cos β)
🔄 Y-Axis Rotation Matrix
Physical Meaning: Rotation about Y-axis corresponds to “pitch” motion - like an aircraft nose up or down. Rotates vectors around the Y-axis, leaving Y-coordinates unchanged while rotating X and Z components in the XZ-plane.
Rotation about Z-axis by angle γ:
Geometric Analysis:
After rotating axis A:
After rotating axis B:
Transformation Summary:
Before
After
A(1,0,0)
A(cos γ, sin γ, 0)
B(0,1,0)
B(-sin γ, cos γ, 0)
C(0,0,1)
C(0,0,1)
🔄 Z-Axis Rotation Matrix
Physical Meaning: Rotation about Z-axis corresponds to “yaw” motion - like an aircraft turning left or right. Rotates vectors around the Z-axis, leaving Z-coordinates unchanged while rotating X and Y components in the XY-plane.
Rotation Matrix Properties
📐 Essential Rotation Matrix Properties
Orthogonality: (columns are orthonormal vectors)
Determinant: (proper rotations, no reflections)
Inverse: (transpose equals inverse)
Composition: applies first, then , then
Physical Meaning: Rotation matrices preserve lengths and angles, representing pure rotations without scaling or reflection in 3D space.
4×4 Homogeneous Transformation Matrices
Extending the 2D homogeneous coordinate concept to 3D, we use 4×4 matrices to unify rotation and translation into a single mathematical operation. This powerful framework is the foundation for all modern robot kinematics and computer graphics.
🎯 Spatial Transformation Matrix
General 4×4 transformation:
Where:
= 3×3 rotation matrix
= 3×1 translation vector
= [0 0 0] zero vector
Last element = 1 (homogeneous coordinate)
Physical Meaning: 4×4 matrices unify rotation and translation into single mathematical operation for 3D spatial transformations.
Composite 3D Transformations for Robotics
Real robot control requires precise composition of multiple rotations and translations in 3D space. Understanding the systematic rules for matrix multiplication order is essential for accurate end-effector positioning and complex trajectory programming.
🔧 3D Transformation Composition Rules
Matrix multiplication is non-commutative - order matters!
For robot positioning with multiple transformations:
Initial state: Fixed and mobile frames are coincident → Identity matrix
Fixed frame operations: Rotate/translate about fixed axes (X,Y,Z) → Pre-multiply current matrix
Mobile frame operations: Rotate/translate about mobile axes (A,B,C) → Post-multiply current matrix
General composition:
Where transformations are applied in sequence: H_1 first, H_n last.
Euler Angle Representations
Euler angles provide an intuitive way to describe 3D orientations using three sequential rotations about coordinate axes. However, different sequences exist and singularities must be carefully managed. Additionally, the terminology (roll, pitch, yaw) depends heavily on which coordinate system convention is being used.
Advantage: Often more natural for systems with cylindrical or axial symmetry.
Gimbal Lock phenomenon:
Occurs when middle rotation angle reaches critical values
Results in loss of one degree of freedom
Two rotation axes become parallel (aligned)
Mathematical: Jacobian matrix becomes singular
ZYX singularity: β = ±90° (pitch vertical - looking straight up or down)
ZYZ singularity: β = 0° or 180° (middle Y-rotation collapses)
At singularity:
Cannot uniquely determine all three angles
Small changes in orientation cause large angle changes
Numerical instability in conversions
Avoidance strategies:
Use alternative Euler angle sequences near singularities
Switch between different conventions dynamically
Employ quaternion representations (no singularities)
Plan trajectories to avoid singular configurations
Rotation About an Arbitrary Axis Through the Origin
Rotation about an arbitrary axis is essential when the rotation cannot be decomposed into simple X, Y, Z rotations. Two primary methods exist: the decomposition approach and Rodrigues’ formula. Each has specific advantages depending on the application context.
Problem Setup: Given a fixed frame OXYZ and an arbitrary rotation axis V = (x,y,z) with components V_x, V_y, V_z, we need to construct the rotation matrix R(V,θ) for rotation angle θ.
Rodrigues’ formula provides a compact, elegant expression for arbitrary axis rotations using matrix exponentials and the skew-symmetric matrix form. This is the preferred method for computational implementations.
⚡ Rodrigues' Rotation Formula
Matrix exponential form:
Where:
I = 3×3 identity matrix
W = skew-symmetric matrix of unit vector
θ = rotation angle
Skew-symmetric matrix construction:
Key property: (outer product minus identity)
Note: Rodrigues formula only works for rotations about axes passing through the origin.
Example: Same 90° rotation about V = (2, 2, 2) using Rodrigues
Click to reveal Rodrigues method calculations
Unit vector:
Skew-symmetric matrix W:
Compute W²:
Apply Rodrigues formula:
✅ (same result!)
Comparison and Method Selection
Criterion
Decomposition
Rodrigues
Computational cost
High (5 matrix mults)
Low (2 matrix ops)
Code complexity
Medium
Low
Geometric intuition
Excellent
Poor
Numerical stability
Good
Excellent
Best use case
Education, analysis
Implementation
Connection to
Euler angles
Quaternions
General recommendation: Use Rodrigues’ formula for all computational work (robot control, graphics engines, simulation). Use decomposition approach for teaching, learning, and analytical derivations.
Application 1: Vision-Guided Robotic Pick-and-Place System (Manufacturing Automation)
A vision-guided robotic system uses a camera to locate workpieces for automated pick-and-place operations in a manufacturing cell.
🔧 Equivalent System Model
Given transformation matrices:
H₁ = Workpiece position relative to camera:
H₂ = Robot base position relative to camera:
Step 1: Calculate Inverse Transformation H₂⁻¹
Click to reveal inverse transformation calculation
Homogeneous transformation inverse formula:
For , the inverse is:
✅
Extract rotation and translation from H₂:
Calculate R₂ᵀ:
(symmetric matrix) ✅
Calculate -R₂ᵀd₂:
✅
Form H₂⁻¹:
✅
Verify by multiplication (H₂ · H₂⁻¹ = I):
✅ Verified!
Step 2: Calculate Workpiece Position Relative to Robot Base
Click to reveal workpiece coordinate transformation
Transformation chain relationship:
The workpiece position relative to the robot base is:
(chain product rule) ✅
✅
Why? We need to transform from camera frame to robot base frame (H₂⁻¹), then apply the workpiece-to-camera transform (H₁).
Matrix multiplication:
Compute rotation part (R = R₂⁻¹ · R₁):
✅
Compute position/translation part:
For homogeneous matrix multiplication , the translation part is:
Extract translation vectors:
From :
From :
Calculate :
Add :
Therefore, the workpiece position is in robot base coordinates ✅
Complete 4×4 matrix multiplication:
✅
Result interpretation:
Position: Workpiece is at in robot base coordinates
Orientation: The rotation matrix columns show where each workpiece axis points in robot coordinates:
Workpiece X-axis: → Robot negative Y ✅
Workpiece Y-axis: → Robot negative X ✅
Workpiece Z-axis: → Robot positive Z (unchanged) ✅
Understanding this rotation:
Since Z-axis is unchanged, the transformation acts only in the XY-plane
Check determinant: ⚠️
This is NOT a pure rotation (Pure rotations have det = +1)
Robot grasping: End-effector moves to (8, 5, 4) with the orientation specified by R
Step 3: Camera Recalibration Analysis
Click to reveal camera rotation effect
Camera rotation scenario:
If the camera is rotated 45° about its current Y-axis, we need to determine how this affects the workpiece observation.
Y-axis rotation matrix:
✅
New camera transformation:
✅
Updated workpiece observation (H₁’):
The new workpiece-to-camera relationship becomes:
✅
Workpiece position in robot frame (after camera rotation):
Computing the rotation part (R):
Row 1: , ,
Row 2: , ,
Row 3: , ,
Computing the translation part (t):
✅
Interpretation: After the 45° camera rotation, the workpiece appears at position (9.95, 5, 7.29) mm in robot base coordinates, with an altered orientation shown by the rotation matrix.
Practical implication:
Camera rotation changes the observed workpiece coordinates. The vision system must be recalibrated to maintain accurate robot positioning.
Step 4: Point Transformation Through Frames
Click to reveal 3D point transformation example
Problem: A point P(3, 1, 2) is attached to a mobile frame that undergoes:
Step 5: Transform Sensor Point and Verify Distance
Click to reveal point transformation and verification
Apply transformation to sensor point P(1, 1, 0):
Calculate each component:
X-coordinate: ✅
Y-coordinate: ✅
Z-coordinate: ✅
Final sensor position:
✅
Verify distance preservation (rotation only):
Original distance from origin: ✅
After rotation (before translation):
Apply only rotation part:
Computing each component:
Row 1:
Row 2:
Row 3:
Distance after rotation: ✅
Verification: The distance matches the original distance, confirming that the rotation matrix preserves distances as expected.
Property confirmation:
Theoretical guarantee: Rotation matrices preserve distances because they are orthogonal:
The distance verification above confirms this property holds for our composite rotation matrix. ✅
Application 3: Robotic Welding of Pipe Joints (Manufacturing)
A 3-axis welding robot must perform orbital welding around a horizontal pipe with the torch perpendicular to the pipe surface at key positions around the weld.
🔧 Equivalent System Model
Given:
Pipe parameters: Radius R = 100 mm, horizontal pipe aligned with X-axis
Pipe centerline direction: (along X-axis)
Starting point: θ = 0° at top of pipe (pointing in +Z direction)
Torch requirements: Torch Z-axis must align with surface normal (pointing radially outward from pipe)
Coordinate system: YZ-plane is perpendicular to pipe axis
Step 1: Surface Normal Calculation at Waypoints
Click to reveal surface normal calculations
Understanding the coordinate system and notation:
Coordinate system setup (RIGHT-HANDED):
The X-axis runs horizontally left-to-right (pipe direction)
The Y-axis points upward vertically (toward the ceiling)
The Z-axis points to the side (imagine lying along X-axis: legs at left, head at right, Z points to your right side)
Alternative Z-axis description: when viewing the XY plane on paper, Z comes out of the paper toward you
We look at the pipe’s circular cross-section in the YZ-plane
Vector notation explained:
, , are unit vectors (length = 1) pointing along each axis
means “1 unit in X-direction, 0 in Y, 0 in Z”
means “0 in X, 1 unit in Y-direction (upward), 0 in Z”
means “0 in X, 0 in Y, 1 unit in Z-direction (out toward you)”
means “unit normal vector” (perpendicular to the pipe surface, pointing radially outward)
Angular position θ convention:
We define θ = 0° at the TOP of the pipe (highest point, where normal points straight up in +Y direction)
θ increases as we rotate clockwise when viewing from the left (looking down the pipe in +X direction)
This is a choice of convention - we could pick any starting point, but starting at the top is intuitive
Geometric reasoning - where does the normal point?
Imagine standing at the left end of the pipe, looking at the circular cross-section in the YZ-plane:
At θ = 0° (top): Normal points straight up → +Y-direction →
At θ = 90° (toward you): Normal points out of paper → +Z-direction →
At θ = 180° (bottom): Normal points straight down → -Y-direction →
At θ = 270° (away from you): Normal points into paper → -Z-direction →
Deriving the formula for surface normal:
Looking at the circular cross-section in the YZ-plane, the normal vector rotates around the circle.
At angle θ measured clockwise from the top:
The vertical component (Y) starts at 1, decreases: this follows cosine
The Z component (out of paper) starts at 0, increases: this follows sine
General formula:
This means: “Mix the up-direction () and out-of-paper direction () using cosine and sine to get the correct angle.”
Calculating surface normal at θ = 0° (top of pipe):
Substitute values: and
Convert to coordinates:
✅
Interpretation:
X-component = 0 (doesn’t point along pipe)
Y-component = 1 (points straight up!)
Z-component = 0 (no out-of-paper component)
Calculating surface normal at θ = 90° (side toward you):
Substitute values: and
Convert to coordinates:
✅
Interpretation:
X-component = 0 (doesn’t point along pipe)
Y-component = 0 (no vertical component)
Z-component = 1 (points out of paper toward you!)
General formula in coordinate form:
Written as a column vector:
✅
All 4 waypoint normal vectors:
Point
θ (°)
Calculation
n_x
n_y
n_z
Physical Direction
|n|
0
0
(0, cos 0°, sin 0°)
0
1
0
Top (+Y)
1.000 ✅
1
90
(0, cos 90°, sin 90°)
0
0
1
Side (+Z, toward you)
1.000 ✅
2
180
(0, cos 180°, sin 180°)
0
-1
0
Bottom (-Y)
1.000 ✅
3
270
(0, cos 270°, sin 270°)
0
0
-1
Side (-Z, away)
1.000 ✅
Step 2: Tool Orientation Matrix Construction
Click to reveal orientation matrix calculations
What is a “tool frame” and why do we need it?
The welding torch has its own coordinate system attached to it:
The torch must point perpendicular to the pipe surface (to make a good weld)
We need to describe which way the torch is pointing in 3D space
We do this by defining three perpendicular axes attached to the torch
Tool frame axis definitions:
Z-axis (torch tip direction): Points where the torch is aimed - must align with surface normal to be perpendicular to pipe
X-axis (torch advance direction): Points along the welding direction - tangent to the pipe circumference (direction torch moves around the circle in the YZ plane)
Y-axis (pipe axis direction): Points along the pipe axis - calculated automatically to complete a right-handed coordinate system
Why these choices?
Z-axis MUST be perpendicular to the pipe (required for welding)
X-axis tangent to the circumference because the torch moves AROUND the pipe (orbital welding in the YZ plane)
Y-axis points along the pipe axis to complete the right-handed coordinate system
Tool orientation at θ = 0° (top of pipe):
What we know:
At the top, the surface normal points straight up:
This means the torch must point upward too
The torch moves around the circumference (orbital welding)
Building the tool frame step-by-step:
Step 2a: Z-axis (where torch points):
Torch must be perpendicular to pipe surface
At top of pipe, this means pointing upward (in +Y direction): ✅
Step 2b: X-axis (welding direction - tangent to circle):
The torch moves around the pipe circumference in the YZ plane
At the top (θ = 0°), moving clockwise when viewed from the left means moving in the +Z direction
The tangent vector is: ✅
Step 2c: Y-axis (complete the frame):
Must be perpendicular to both X and Z axes
We use the cross product:
Cross product calculation:
Using cross product formula:
✅
Step 2d: Build the rotation matrix:
A rotation matrix has the tool frame axes as its columns
Format: (three column vectors side-by-side)
Physical meaning: At the top of the pipe, the torch points upward (+Y), moves around the circumference toward +Z, with Y-axis pointing along the pipe (+X). ✅
Tool orientation at θ = 90° (side toward you):
What we know:
At the side, the surface normal points out toward you:
This means the torch must point toward you
The torch continues moving around the circumference
Building the tool frame:
Step 3a: Z-axis (where torch points):
Must point toward you (in +Z direction): ✅
Step 3b: X-axis (welding direction - tangent to circle):
At θ = 90°, the tangent to the circle points downward (in -Y direction)
The tangent vector is: ✅
Step 3c: Y-axis (cross product): ✅
Step 3d: Build the rotation matrix:
Physical meaning: At θ = 90°, the torch points toward you (+Z), moves downward around the circumference (-Y), with Y-axis pointing along the pipe (+X). ✅
Complete the other waypoints (θ = 180° and 270°):
Following the same process for the bottom and other side:
At θ = 180° (bottom):
Surface normal: (points down)
Z-axis:
X-axis (tangent): (motion in -Z direction)
Y-axis:
Rotation matrix:
At θ = 270° (away from you):
Surface normal: (points away)
Z-axis:
X-axis (tangent): (motion in +Y direction, upward)
Y-axis:
Rotation matrix:
Summary table of all 4 waypoints:
θ (°)
Position
Torch Points
X-axis (tangent)
Y-axis (pipe)
Z-axis (normal)
R_tool (3×3 matrix)
0
Top
Up (+Y)
(0,0,1)
(1,0,0)
(0,1,0)
90
Side
Toward you (+Z)
(0,-1,0)
(1,0,0)
(0,0,1)
180
Bottom
Down (-Y)
(0,0,-1)
(1,0,0)
(0,-1,0)
270
Side
Away (-Z)
(0,1,0)
(1,0,0)
(0,0,-1)
Important pattern to recognize:
Look at the second column of all the matrices - it’s always !
This is the tool Y-axis, which always points along the pipe X-axis
This column never changes because the pipe axis remains fixed in world coordinates
The key insight:
All these matrices represent rotations where the pipe axis direction (Y-axis of tool frame) remains constant
The torch rotates around the pipe circumference while maintaining perpendicularity
The first column (X-axis) traces out the tangent to the circular path
The third column (Z-axis) traces out the normal vector around the circle
Physical interpretation:
The torch moves in a circular path in the YZ plane (perpendicular to the pipe)
At each position, the torch points radially outward (perpendicular to surface)
The torch advance direction is always tangent to the circle (direction of motion)
The Y-axis of the tool always aligns with the pipe, making programming simpler
Step 3: Euler Angle Extraction (ZYX Convention)
Click to reveal Euler angle extraction
What are Euler angles and why do we need them?
The problem:
We have rotation matrices that describe the torch orientation
But robot controllers don’t understand matrices directly
They need three simple rotation angles: pitch, yaw, and roll
What are Euler angles?
Pitch (α): Rotation about X-axis
Yaw (β): Rotation about Y-axis
Roll (γ): Rotation about Z-axis
ZYX convention means: apply rotations in order Z (roll), then Y (yaw), then X (pitch)
Note: This naming convention matches our coordinate system where the pipe is along X, and we rotate around it.
The extraction formulas (you don’t need to memorize these!):
Given rotation matrix :
These formulas extract the angles by looking at specific matrix elements:
Roll (γ): (looks at positions rows 2 & 1, column 1)
Don’t worry about deriving these - they come from the ZYX rotation sequence definition. Just know how to use them!
Important: When , we encounter a gimbal lock singularity where pitch and roll become ambiguous.
Extracting Euler angles at θ = 0° (top of pipe):
Our rotation matrix:
Labeling the elements:
Calculating yaw: ⚠️
Gimbal lock detected! When , we have a singularity. At this configuration, pitch and roll rotations become geometrically equivalent, so we set by convention and solve for :
For gimbal lock at :
Result: (pitch, yaw, roll) = (-90°, -90°, 0°)
Physical meaning: This is a singular configuration where multiple angle combinations produce the same orientation. The robot controller must handle this carefully.
Extracting Euler angles at θ = 90° (side toward you):
Our rotation matrix:
Labeling the elements:
Calculating yaw: ✅
Calculating pitch: ✅
Calculating roll: ✅
Result: (pitch, yaw, roll) = (0°, 0°, -90°)
Physical meaning: A pure roll of -90° about the Z-axis. The torch points toward you at the side of the pipe.
What about gimbal lock (singularities)?
The danger zone: If yaw β = ±90°, the formulas break down (gimbal lock!)
Checking for gimbal lock:
Singularity happens when
At θ = 0°: → Gimbal lock! ⚠️
At θ = 90°: → Safe ✅
At θ = 180°: → Gimbal lock! ⚠️
At θ = 270°: → Safe ✅
Why do we have gimbal lock?
At the top and bottom of the pipe, the yaw angle reaches ±90°
At these positions, pitch and roll rotations become geometrically equivalent
Robot controllers must use alternative parameterizations (like quaternions) or avoid these exact positions
For practical welding, we can offset slightly from the exact top/bottom to avoid singularities
Summary: Euler angles for all 4 waypoints:
Calculating for the remaining two waypoints (θ = 180° and 270°) using the same formulas:
At θ = 180°:, → Gimbal lock at
Setting :
Result: (pitch, yaw, roll) = (90°, 90°, 0°)
At θ = 270°:, → No singularity
, ,
Result: (pitch, yaw, roll) = (180°, 0°, 90°)
Point
θ (°)
Position
Pitch α (°)
Yaw β (°)
Roll γ (°)
Robot Command
Singular?
0
0
Top
-90
-90
0
Avoid (gimbal lock)
Yes ⚠️
1
90
Side (+Z)
0
0
-90
”Roll -90°“
No ✅
2
180
Bottom
90
90
0
Avoid (gimbal lock)
Yes ⚠️
3
270
Side (-Z)
180
0
90
”Pitch 180°, Roll 90°“
No ✅
The key insight:
Gimbal lock occurs at top and bottom (θ = 0° and 180°) where yaw = ±90°
At the sides (θ = 90° and 270°), the configuration is non-singular
In practice, start welding from θ = 90° and avoid passing through exact top/bottom
Robot motion planning must account for these singularities in the workspace
Physical meaning: Rotating 20° about Y-axis (pitching up) - like nodding your head upward.
Combining the rotations (matrix multiplication):
Matrix multiplication (showing key elements):
Element (1,1):
Element (1,2):
Element (1,3):
Element (2,1):
Element (2,2):
Element (2,3):
Element (3,1):
Element (3,2):
Element (3,3):
Result: ✅
What does this matrix tell us?
Each column of the matrix tells us where the drone’s axes point:
Column 1 (X-axis): Where the drone’s “forward” direction points
Column 2 (Y-axis): Where the drone’s “up” direction points
Column 3 (Z-axis): Where the drone’s “right” direction points
The drone’s “up” direction (column 2) is (0.0594, 0.9848, 0.1631) - mostly still pointing up (Y=0.9848), but tilted slightly forward and to the side.
Step 2: Desired Camera Orientation Matrix
Click to reveal desired orientation calculations
What do we want the camera to do?
The goal:
Camera should point straight down toward the ground
This means the camera’s “down” direction should align with the world’s “down” direction (-Y)
The camera should be level (not tilted/rolled)
In our coordinate system:
World “down” = -Y direction = (0, -1, 0)
Camera optical axis points along its own Z-axis
So we want camera Z-axis = (0, -1, 0)
What is the desired orientation matrix?
When the camera points straight down with no rotation:
Camera X-axis (forward) points along world X-axis: (1, 0, 0)
Camera Y-axis (up on camera) points along world Z-axis: (0, 0, 1)
Camera Z-axis (optical axis) points down: (0, -1, 0)
Building the matrix from these column vectors: ✅
Verification - does the camera point down?
Apply the rotation to the camera’s Z-axis unit vector (0, 0, 1):
Result: (0, -1, 0) means the camera points straight down in the -Y direction! ✅
Physical meaning:
This matrix represents a 90° rotation about the X-axis:
Imagine starting with the camera pointing forward
Rotate it 90° down (nose down) about the X-axis
Now it points straight at the ground
Step 3: Gimbal Compensation Calculation
Click to reveal gimbal compensation calculations
Understanding the problem:
The relationship:
The camera is mounted on the gimbal
The gimbal is mounted on the drone
Camera orientation in world = (Drone orientation) × (Gimbal orientation)
Mathematically:
What we know:
= how the drone is tilted (calculated in Step 1)
= we want camera pointing straight down (from Step 2)
= this is what we need to find!
Solving for the gimbal orientation:
From:
We can solve for by multiplying both sides by (the inverse):
Key trick: For rotation matrices, the inverse equals the transpose!
Calculate the drone’s inverse (transpose):
From Step 1, we had:
Transpose (swap rows and columns): ✅
Calculate gimbal compensation matrix:
Matrix multiplication (showing all 9 elements):
Row 1:
(1,1):
(1,2):
(1,3):
Row 2:
(2,1):
(2,2):
(2,3):
Row 3:
(3,1):
(3,2):
(3,3):
Result: ✅
What does this mean?
This matrix tells the gimbal: “To cancel out the drone’s tilt and point the camera straight down, you need to rotate in the opposite direction of the drone’s tilt.”
Step 4: Extract Gimbal Euler Angles (Roll and Pitch)
Click to reveal Euler angle extraction
Why extract Euler angles?
The gimbal motors need simple angle commands: “rotate roll by X°, pitch by Y°”
We have a 3×3 matrix, but need to extract the roll and pitch angles from it
This is the reverse of what we did in Step 1
Euler angle extraction formulas:
Given rotation matrix :
Pitch (θ):
Roll (φ):
Our gimbal matrix:
Calculate pitch:
✅
Physical meaning: Gimbal needs to pitch down by 20° to compensate for drone pitching up by 20°!
Why Euler angle extraction is tricky here:
Extracting Euler angles from the gimbal compensation matrix is more complex than it might seem for a 2-axis gimbal. The matrix we calculated represents the combined compensation needed, but extracting meaningful roll and pitch angles depends on the specific rotation sequence the gimbal hardware uses.
The key insight:
The gimbal needs to rotate opposite to the drone’s motion
Drone rolled 10° right → gimbal should roll ~10° left
Drone pitched 20° up → gimbal should pitch ~20° down
Better approach: Direct verification
Instead of extracting Euler angles, let’s verify directly that the camera points down after compensation (Step 5).
Step 5: Verification - Does the Camera Point Straight Down?
Click to reveal verification calculations
The test: Does the final camera point straight down?
We need to verify:
What we’ll check:
Apply the gimbal compensation to the tilted drone
See where the camera’s Z-axis (optical axis) ends up pointing
It should point straight down: (0, -1, 0)
Calculate final camera orientation:
We only need to check where the camera Z-axis points (third column of result):
Camera Z-axis = = (third column of )
Element (1,3): ✅
Element (2,3): ✅
Element (3,3): ✅
Result: Camera Z-axis points to = straight down! ✅
Success!
The gimbal compensation works perfectly:
Drone is tilted (roll = 10°, pitch = 20°)
Gimbal compensates with opposite rotations
Camera ends up pointing straight down at the ground
Application 5: Satellite Attitude Control for Solar Tracking (Space Systems)
A satellite needs to reorient its solar panels to point toward the sun using reaction wheel actuation.
🔧 Equivalent System Model
Given:
Spacecraft body frame: X = velocity direction, Y = radial (toward Earth), Z = orbit normal
Solar panel normal (current): Along +Z body axis = [0, 0, 1]
Sun direction (in body frame): [0.6, 0, 0.8] (normalized)
Solar panel area: 2.5 m², efficiency 30%
Task: Find rotation matrix R that aligns panel normal with sun direction
What makes this interesting:
We cannot decompose this into simple X, Y, Z rotations easily
Instead, we use Rodrigues formula for arbitrary axis rotation
This is how real spacecraft attitude control systems work
Step 1: Identify Current and Desired Panel Orientations
Click to reveal vector setup
Current solar panel normal (before rotation):
The solar panel is mounted on the spacecraft with its normal vector pointing along the +Z body axis.
Physical interpretation: Panel faces “up” relative to orbit plane.
Sun direction in body frame:
At this moment in the orbit, sensors measure the sun direction in the spacecraft body frame:
Verify this is a unit vector: ✅
Physical interpretation: Sun is in the XZ-plane (no Y-component), pointing mostly forward (+X) and somewhat “up” (+Z).
Desired panel normal (after rotation):
To maximize solar power, we want the panel normal to point directly at the sun:
Visualization of the rotation problem:
Vector
Direction
Coordinates
Current normal
Along +Z axis
[0, 0, 1]
Sun direction
In XZ-plane
[0.6, 0, 0.8]
Need to rotate
From current to sun
?
Key observation: Both vectors lie in the XZ-plane (Y-component is zero for both), so the rotation axis must be perpendicular to the XZ-plane (i.e., along Y-axis or close to it).
Step 2: Calculate Rotation Axis and Angle
Click to reveal rotation axis and angle calculations
Find the rotation axis using cross product:
The rotation axis must be perpendicular to both the current panel normal and the desired (sun) direction. We use the cross product:
Cross product formula reminder:
Apply the formula:
X-component:
Y-component:
Z-component:
Physical interpretation: Rotation axis points along +Y (toward Earth). This makes sense since both the current normal and sun direction are in the XZ-plane.
Normalize to get unit rotation axis:
Result: Unit rotation axis is exactly the +Y body axis.
Calculate rotation angle using dot product:
Verify using cross product magnitude:
For unit vectors:
✅
Check trigonometric identity: ✅
Summary of rotation parameters:
Parameter
Value
Physical Meaning
Rotation axis
[0, 1, 0]
Along +Y (toward Earth)
Rotation angle
36.87°
Tilt panel forward toward sun
Rotation direction
Right-hand rule
Thumb along +Y, fingers curl from +Z toward +X
Step 3: Build Rotation Matrix Using Rodrigues Formula
Click to reveal Rodrigues rotation matrix construction
Rodrigues rotation formula:
For a rotation by angle φ about unit axis :
Where:
= 3×3 identity matrix
= skew-symmetric matrix of
= rotation angle
Why this works: Rodrigues formula gives the same result as rotating a vector around an arbitrary axis, derived from exponential map of rotation.
Construct skew-symmetric matrix W:
For rotation axis :
Physical meaning: The skew-symmetric matrix represents the cross product operation with .
Calculate :
Element-by-element multiplication:
Row 1, Col 1:
Row 1, Col 2:
Row 1, Col 3:
Row 2, Col 1:
Row 2, Col 2:
Row 2, Col 3:
Row 3, Col 1:
Row 3, Col 2:
Row 3, Col 3:
Apply Rodrigues formula with φ = 36.87°:
Add element-by-element:
✅
Physical interpretation of the rotation matrix:
This is a rotation about the Y-axis by 36.87°. Notice:
Middle row/column unchanged: [0, 1, 0] (Y-axis is rotation axis)
X and Z components mix according to rotation angle
This is exactly from standard rotation matrix formulas
Comparison to standard Y-axis rotation: ✅
Key insight: For this problem, Rodrigues formula gives us the same result as a simple Y-axis rotation. But Rodrigues formula works for ANY arbitrary axis, not just X, Y, or Z!
Step 4: Verify the Rotation Works
Click to reveal verification
Apply rotation to current panel normal:
Matrix-vector multiplication:
X-component:
Y-component:
Z-component:
Compare to desired (sun direction):
Desired:
Actual:
Perfect match! ✅
Calculate solar power output:
Solar panels generate maximum power when perpendicular to sunlight. Power follows cosine law:
Dot product (alignment factor):
Maximum possible power:
Actual power (perfect alignment): ✅
This is maximum possible power from these solar panels!
Summary:
Parameter
Value
Status
Rotation axis
[0, 1, 0] (Y-axis)
✅
Rotation angle
36.87°
✅
Panel alignment
Perfect (error = 0)
✅
Solar power
1025 W
✅ Maximum
Method
Rodrigues formula
✅
Summary and Next Steps
In this lesson, you learned 3D rotation and transformation mathematics through theory and applications.
Key Skills Developed:
Construct rotation matrices for X, Y, Z coordinate axes using trigonometric relationships
Apply Euler angle sequences (ZYX, ZYZ) while managing singularities and gimbal lock
Calculate arbitrary axis rotations using decomposition method or Rodrigues formula
Compose 4×4 homogeneous transformation matrices for unified rotation and translation
Two Methods for Arbitrary Axis Rotations:
Decomposition approach: Intuitive 5-step geometric method (best for education and analysis)


Comments