Why Code Works Well Here
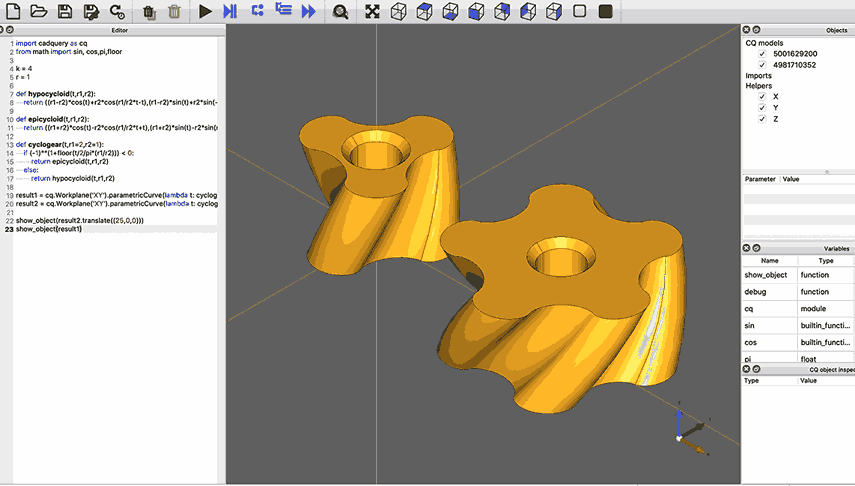
Change rows and cols, and the entire brick regenerates with the correct number of studs, wall cavities, and dimensions. One rarray() call places all the studs at once. Want a 10x10 brick? Just change two numbers.
In a GUI-based CAD tool, creating 50 variations of the same part means clicking through the same dialog 50 times. Generating geometry from a math equation means manually plotting points and connecting them with splines. And version-controlling a binary CAD file is nearly impossible: you cannot diff it, merge it, or review changes in a pull request. Code-based CAD solves all three problems because your model is a Python script. This lesson presents 8 short, complete CadQuery scripts that each produce a 3D model, from parametric Lego bricks to planetary gear sets, showing where a code-first approach shines. #CadQuery #CodeCAD #ParametricDesign
Start by creating a project folder and a virtual environment, then install the four packages you need: CadQuery for 3D modeling, trimesh for GLB export, NumPy for array operations, and SciPy for mesh color processing.
mkdir -p lesson-0/outputcd lesson-0python3 -m venv cadquery-envsource cadquery-env/bin/activatepip install cadquery trimesh numpy scipymkdir lesson-0mkdir lesson-0\outputcd lesson-0python -m venv cadquery-envcadquery-env\Scripts\activatepip install cadquery trimesh numpy scipyIf you have WSL set up, you can use the same Linux commands inside your WSL terminal:
mkdir -p lesson-0/outputcd lesson-0python3 -m venv cadquery-envsource cadquery-env/bin/activatepip install cadquery trimesh numpy scipyVerify the installation:
python -c "import cadquery, trimesh, numpy, scipy; print('All packages installed OK')"After completing this lesson, your folder should look like this:
Each script produces three files: .step for precise CAD editing in FreeCAD, .stl for 3D printing, and .glb for colored 3D viewing in a browser.
All 8 examples use a shared export_helper.py that handles STEP, STL, and GLB output. The helper converts CadQuery shapes to colored GLB files via trimesh, so models look great in SiliconWit’s GLB viewer.
Save this file as export_helper.py in your working directory:
"""Shared export functions for CadQuery examples.Exports shapes to STEP, STL, and colored GLB."""
import osimport numpy as npimport cadquery as cqimport trimesh
OUTPUT_DIR = os.path.join(os.path.dirname(__file__), "output")os.makedirs(OUTPUT_DIR, exist_ok=True)
def _cq_to_trimesh(shape, tolerance=0.1):    """Convert a CadQuery shape to a trimesh object via temporary STL."""    tmp_path = os.path.join(OUTPUT_DIR, "_temp.stl")    cq.exporters.export(shape, tmp_path, tolerance=tolerance)    mesh = trimesh.load(tmp_path)    os.remove(tmp_path)    return mesh
def export_all(shape, name, color, tolerance=0.1):    """    Export a single-color, single-part shape to STEP, STL, and GLB.    color: RGB tuple, 0-255, e.g. (220, 40, 40)    """    step_path = os.path.join(OUTPUT_DIR, f"{name}.step")    stl_path = os.path.join(OUTPUT_DIR, f"{name}.stl")    glb_path = os.path.join(OUTPUT_DIR, f"{name}.glb")
    cq.exporters.export(shape, step_path)    cq.exporters.export(shape, stl_path, tolerance=tolerance)
    mesh = trimesh.load(stl_path)    r, g, b = color    mesh.visual = trimesh.visual.ColorVisuals(        mesh=mesh,        face_colors=np.full((len(mesh.faces), 4), [r, g, b, 255], dtype=np.uint8),    )    mesh.export(glb_path)    _print_summary(name, step_path, stl_path, glb_path)
def export_gradient(shape, name, color_bottom, color_top, tolerance=0.1):    """    Export a shape with Z-gradient vertex colors to STEP, STL, and GLB.    Colors interpolate from color_bottom (min Z) to color_top (max Z).    """    step_path = os.path.join(OUTPUT_DIR, f"{name}.step")    stl_path = os.path.join(OUTPUT_DIR, f"{name}.stl")    glb_path = os.path.join(OUTPUT_DIR, f"{name}.glb")
    cq.exporters.export(shape, step_path)    cq.exporters.export(shape, stl_path, tolerance=tolerance)
    mesh = trimesh.load(stl_path)    vertices = mesh.vertices    z_min, z_max = vertices[:, 2].min(), vertices[:, 2].max()    z_range = z_max - z_min if z_max > z_min else 1.0
    t = ((vertices[:, 2] - z_min) / z_range).reshape(-1, 1)    c_bot = np.array(color_bottom, dtype=np.float64)    c_top = np.array(color_top, dtype=np.float64)    rgb = (1 - t) * c_bot + t * c_top    alpha = np.full((len(vertices), 1), 255, dtype=np.float64)    vertex_colors = np.hstack([rgb, alpha]).astype(np.uint8)
    mesh.visual = trimesh.visual.ColorVisuals(mesh=mesh, vertex_colors=vertex_colors)    mesh.export(glb_path)    _print_summary(name, step_path, stl_path, glb_path)
def export_multipart(parts, name, tolerance=0.1):    """    Export a multi-part, multi-color assembly to STEP, STL, and GLB.    parts: list of (cq_shape, part_name, (r, g, b)) tuples    """    step_path = os.path.join(OUTPUT_DIR, f"{name}.step")    stl_path = os.path.join(OUTPUT_DIR, f"{name}.stl")    glb_path = os.path.join(OUTPUT_DIR, f"{name}.glb")
    assy = cq.Assembly()    for shape, part_name, color in parts:        r, g, b = color        assy.add(shape, name=part_name,                 color=cq.Color(r / 255, g / 255, b / 255, 1))    assy.save(step_path, "STEP")
    scene = trimesh.Scene()    all_meshes = []    for shape, part_name, color in parts:        mesh = _cq_to_trimesh(shape, tolerance)        r, g, b = color        mesh.visual = trimesh.visual.ColorVisuals(            mesh=mesh,            face_colors=np.full((len(mesh.faces), 4), [r, g, b, 255], dtype=np.uint8),        )        scene.add_geometry(mesh, node_name=part_name)        all_meshes.append(mesh)
    combined = trimesh.util.concatenate(all_meshes)    combined.export(stl_path)    scene.export(glb_path)    _print_summary(name, step_path, stl_path, glb_path)
def _print_summary(name, step_path, stl_path, glb_path):    def _size(p):        s = os.path.getsize(p)        return f"{s / 1_000_000:.1f} MB" if s > 1_000_000 else f"{s / 1_000:.0f} KB"    print(f"  {name}:")    print(f"    STEP  {_size(step_path):>8}   {step_path}")    print(f"    STL   {_size(stl_path):>8}   {stl_path}")    print(f"    GLB   {_size(glb_path):>8}   {glb_path}")
Three export modes cover all examples:
export_all() for single-color parts (Lego brick, coaster, perforated plate, cable organizer, spring)export_gradient() for Z-gradient coloring (vase, twisted tower)export_multipart() for multi-color assemblies (planetary gears)Why Code Works Well Here
Change rows and cols, and the entire brick regenerates with the correct number of studs, wall cavities, and dimensions. One rarray() call places all the studs at once. Want a 10x10 brick? Just change two numbers.
"""Example 1: Parametric Lego BrickChange rows/cols, entire brick regenerates."""
import cadquery as cqfrom export_helper import export_all
# Parameters (change these!)rows = 4cols = 2unit = 8.0         # Lego unit spacing (mm)stud_d = 4.8       # Stud diameterstud_h = 1.8       # Stud heightwall = 1.2          # Wall thicknessbrick_h = 9.6       # Standard brick height
# Bodybody = (    cq.Workplane("XY")    .box(cols * unit, rows * unit, brick_h))
# Hollow undersidebody = (    body.faces("<Z").workplane()    .rect(cols * unit - 2 * wall, rows * unit - 2 * wall)    .cutBlind(-(brick_h - wall)))
# Studs on topbody = (    body.faces(">Z").workplane()    .rarray(unit, unit, cols, rows)    .circle(stud_d / 2)    .extrude(stud_h))
print(f"Lego brick: {rows}x{cols} = {rows * cols} studs")export_all(body, "01_lego_brick", (220, 40, 40))Why Code Works Well Here
A nested loop with hex spacing math generates a perfect honeycomb pattern clipped to a circle. Change hex_r or coaster_r and the pattern regenerates with the correct number of cells. The math handles all the positioning automatically.
"""Example 2: Honeycomb CoasterNested loop + hex math generates a perfect pattern."""
import cadquery as cqimport mathfrom export_helper import export_all
# Parametershex_r = 5.0         # Hex cell outer radiuswall = 1.2          # Wall between hexagonsdepth = 3.0         # Pocket depthbase_t = 2.0        # Base thicknesscoaster_r = 45.0    # Overall coaster radius
pitch = hex_r * 2 + wallrow_h = pitch * math.sqrt(3) / 2
# Base disccoaster = cq.Workplane("XY").cylinder(base_t + depth, coaster_r)
# Cut hexagonal pocketshex_pts = []for row in range(-8, 9):    for col in range(-8, 9):        x = col * pitch + (row % 2) * pitch / 2        y = row * row_h        if math.sqrt(x**2 + y**2) + hex_r < coaster_r - 3:            hex_pts.append((x, y))
wp = coaster.faces(">Z").workplane()for x, y in hex_pts:    wp = wp.center(x, y).polygon(6, hex_r * 2).center(-x, -y)
coaster = wp.cutBlind(-depth)
# Round the outer rimcoaster = coaster.edges("|Z").fillet(1.5)
print(f"Honeycomb coaster: {len(hex_pts)} hexagonal pockets")export_all(coaster, "02_honeycomb_coaster", (218, 165, 32))Why Code Works Well Here
The vase profile is a sine wave: r = base_r + amplitude * sin(...). Code lets you define shapes directly from math equations and loft through the resulting cross-sections. Change the amplitude, frequency, or number of sections and the shape updates instantly.
"""Example 3: Mathematical VaseSine-wave profile lofted and shelled into a vase."""
import cadquery as cqimport mathfrom export_helper import export_gradient
# Parametersn_sections = 20height = 120.0base_r = 30.0amplitude = 12.0wall_thickness = 2.5
# Collect profile wireswp = cq.Workplane("XY")for i in range(n_sections + 1):    z = height * i / n_sections    t = i / n_sections    # Sine-modulated radius: wide base, narrow waist, flared top    r = base_r + amplitude * math.sin(t * math.pi * 2 - math.pi / 2)    wire = cq.Workplane("XY").workplane(offset=z).ellipse(r, r * 0.85).val()    wp = wp.add(wire)
# Loft through profiles, then hollowvase = wp.toPending().loft()vase = vase.faces(">Z").shell(-wall_thickness)
print("Mathematical vase: sine-wave profile, 20 cross-sections")export_gradient(vase, "03_math_vase", (0, 128, 128), (218, 165, 32))
The GLB uses a Z-gradient from teal at the base to gold at the top, applied per-vertex by export_gradient().
Why Code Works Well Here
Each floor is a square, rotated by twist_per_floor degrees and scaled down by a taper factor. A loop handles all the repetition precisely. Change the twist angle from 5 to 10 degrees and the entire tower reshapes.
"""Example 4: Twisted TowerEach floor rotated and tapered by a loop, then lofted."""
import cadquery as cqfrom export_helper import export_gradient
# Parametersn_floors = 16floor_h = 8.0side = 30.0twist_per_floor = 5.0   # degreestaper = 0.97             # each floor slightly smaller
# Collect profile wireswp = cq.Workplane("XY")current_side = sidefor i in range(n_floors + 1):    z = floor_h * i    angle = twist_per_floor * i    wire = (        cq.Workplane("XY")        .workplane(offset=z)        .transformed(rotate=(0, 0, angle))        .rect(current_side, current_side)        .val()    )    wp = wp.add(wire)    current_side *= taper
tower = wp.toPending().loft()
print(f"Twisted tower: {n_floors} floors, {twist_per_floor} deg twist each")export_gradient(tower, "04_twisted_tower", (30, 60, 180), (140, 40, 180))Why Code Works Well Here
One rarray() call places a grid of holes. The script computes how many holes fit given the plate size, margins, and spacing. Change the hole diameter or spacing and the entire pattern regenerates from that single line.
"""Example 5: Perforated PlateOne rarray() places 100+ holes instantly."""
import cadquery as cqfrom export_helper import export_all
# Parameterslength = 100width = 80thickness = 4hole_d = 5spacing_x = 10spacing_y = 10margin = 10
# Number of holes that fitnx = int((length - 2 * margin) / spacing_x) + 1ny = int((width - 2 * margin) / spacing_y) + 1
plate = (    cq.Workplane("XY")    .box(length, width, thickness)    .faces(">Z")    .workplane()    .rarray(spacing_x, spacing_y, nx, ny)    .hole(hole_d))
print(f"Perforated plate: {nx * ny} holes in one line of code")export_all(plate, "05_perforated_plate", (192, 192, 200))Why Code Works Well Here
The number of cable slots, their width, depth, and spacing are all parameters. Change n_slots = 6 to n_slots = 12 and the organizer doubles in size with the correct geometry. The slot cutting loop handles all the repetitive work.
"""Example 6: Cable OrganizerParametric slot count and sizes."""
import cadquery as cqfrom export_helper import export_all
# Parametersn_slots = 6slot_w = 8.0        # Slot widthslot_d = 20.0       # Slot depthwall = 3.0          # Wall between slotsbase_h = 8.0        # Base heightslot_h = 25.0       # Slot height above base
total_w = n_slots * slot_w + (n_slots + 1) * walldepth = slot_d + 2 * walltotal_h = base_h + slot_h
# Main bodybody = (    cq.Workplane("XY")    .box(total_w, depth, total_h)    .translate((0, 0, total_h / 2)))
# Cut slots from the topslot_start_x = -total_w / 2 + wall + slot_w / 2slots_shape = cq.Workplane("XY").workplane(offset=base_h)
for i in range(n_slots):    x = slot_start_x + i * (slot_w + wall)    slots_shape = (        slots_shape        .center(x, 0)        .rect(slot_w, slot_d)        .center(-x, 0)    )
slots_solid = slots_shape.extrude(slot_h + 1)
# Round vertical edges of the bodybody = body.edges("|Z").fillet(2.0)
# Cut slotsorganizer = body.cut(slots_solid)
# Chamfer slot entry edgesorganizer = organizer.faces(">Z").edges().chamfer(0.8)
print(f"Cable organizer: {n_slots} slots, {total_w:.0f}mm wide")export_all(organizer, "06_cable_organizer", (0, 140, 140))Why Code Works Well Here
CadQuery’s Wire.makeHelix() generates a true mathematical helix from pitch, height, and radius parameters. A circular wire cross-section is swept along this path. Wire diameter, coil diameter, pitch, and number of turns are all parameters. This is geometry defined entirely from equations.
"""Example 7: Helical SpringWire diameter, coil diameter, pitch all parametric."""
import cadquery as cqfrom export_helper import export_all
# Parameterswire_d = 3.0         # Wire diametercoil_d = 25.0        # Mean coil diameterpitch = 8.0          # Pitch (distance per turn)n_turns = 5          # Number of active turns
coil_r = coil_d / 2height = pitch * n_turns
# Generate a true helix wirehelix_wire = cq.Wire.makeHelix(pitch, height, coil_r)
# Create circular cross-section at helix startcross_section = (    cq.Workplane("YZ")    .transformed(offset=(coil_r, 0, 0))    .circle(wire_d / 2))
# Sweep cross-section along helixspring = cross_section.sweep(cq.Workplane().add(helix_wire))
print(f"Helical spring: {n_turns} turns, {wire_d}mm wire, {coil_d}mm coil")export_all(spring, "07_spring", (140, 150, 170), tolerance=0.5)Why Code Works Well Here
Sun gear, planet gears, and ring gear all derive from a shared module value and tooth counts. The constraint ring_z = sun_z + 2 * planet_z is enforced automatically. Change the module or tooth counts and every gear regenerates with correct meshing. The multi-part GLB export gives each component its own color.
"""Example 8: Planetary Gear SetSun, planets, ring from shared module value."""
import cadquery as cqimport mathfrom export_helper import export_multipart
# Parametersmodule = 2.0         # Gear module (mm)sun_z = 16           # Sun gear tooth countplanet_z = 8         # Planet gear tooth countn_planets = 3        # Number of planet gearsgear_h = 10.0        # Gear face widthpressure_angle = 20  # degrees
# Derivedring_z = sun_z + 2 * planet_z  # Ring gear tooth countsun_r = module * sun_z / 2planet_r = module * planet_z / 2ring_r = module * ring_z / 2orbit_r = sun_r + planet_r      # Planet orbit radius
def make_gear_profile(z, m, pa=20):    """Create a simplified gear profile using polygon approximation."""    r_pitch = m * z / 2    r_outer = r_pitch + m    r_root = r_pitch - 1.25 * m
    points = []    for i in range(z):        angle = 2 * math.pi * i / z
        # Tooth tip        for j in [-1, 0, 1]:            a = angle + j * math.pi / (z * 3)            r = r_outer if j == 0 else r_pitch            points.append((r * math.cos(a), r * math.sin(a)))
        # Tooth root        a_root = angle + math.pi / z        for j in [-1, 0, 1]:            a = a_root + j * math.pi / (z * 4)            points.append((r_root * math.cos(a), r_root * math.sin(a)))
    return points
def make_gear(z, m, height, bore_d=0):    """Create a gear solid from tooth count and module."""    pts = make_gear_profile(z, m)    gear = (        cq.Workplane("XY")        .polyline(pts).close()        .extrude(height)    )    if bore_d > 0:        gear = gear.faces(">Z").workplane().hole(bore_d)    return gear
def make_ring_gear(z_ring, z_planet, m, height):    """Create an internal ring gear (outer disc with internal teeth)."""    r_outer = m * z_ring / 2 + 3 * m    pts = make_gear_profile(z_ring, m)    inner_profile = (        cq.Workplane("XY")        .polyline(pts).close()        .extrude(height)    )    outer_disc = cq.Workplane("XY").cylinder(height, r_outer)    ring = outer_disc.cut(inner_profile)    return ring
# Build the assemblysun = make_gear(sun_z, module, gear_h, bore_d=6)
planets = []for i in range(n_planets):    angle = 2 * math.pi * i / n_planets    px = orbit_r * math.cos(angle)    py = orbit_r * math.sin(angle)    planet = make_gear(planet_z, module, gear_h, bore_d=4)    planet = planet.translate((px, py, 0))    planets.append(planet)
ring = make_ring_gear(ring_z, planet_z, module, gear_h)
# Carrier platecarrier = (    cq.Workplane("XY")    .workplane(offset=-3)    .cylinder(3, orbit_r + planet_r - 2))carrier = carrier.faces(">Z").workplane().hole(6)
parts = [    (sun, "sun_gear", (218, 165, 32)),       # Gold    (ring, "ring_gear", (0, 140, 140)),       # Teal    (carrier, "carrier", (160, 160, 165)),    # Gray]for i, p in enumerate(planets):    parts.append((p, f"planet_{i}", (200, 50, 50)))  # Red
print(f"Planetary gear set: sun={sun_z}T, planet={planet_z}T, ring={ring_z}T")export_multipart(parts, "08_planetary_gears")Save this as run_all.py to generate all 24 output files at once:
"""Run all 8 examples and generate STEP/STL/GLB output."""
import subprocess, sys, os, time
SCRIPTS = [    "01_lego_brick.py",    "02_honeycomb_coaster.py",    "03_math_vase.py",    "04_twisted_tower.py",    "05_perforated_plate.py",    "06_cable_organizer.py",    "07_spring.py",    "08_planetary_gears.py",]
script_dir = os.path.dirname(os.path.abspath(__file__))
for script in SCRIPTS:    print(f"\n--- {script} ---")    result = subprocess.run(        [sys.executable, os.path.join(script_dir, script)],        cwd=script_dir, capture_output=True, text=True,    )    print(result.stdout, end="")    if result.returncode != 0:        print(f"  FAILED: {result.stderr.strip().splitlines()[-1]}")
print("\nDone! Check the output/ directory for STEP, STL, and GLB files.")
Upload the generated .glb files to SiliconWit’s GLB Viewer to see the colored 3D models. Open the .step files in FreeCAD for precise measurements and further editing.
Comments