Threshold Alerts
The most common type. Fire when a value crosses a boundary. Examples: temperature exceeds 35 C, battery voltage drops below 3.2 V, humidity exceeds 80%. Can be upper, lower, or both (band alert).
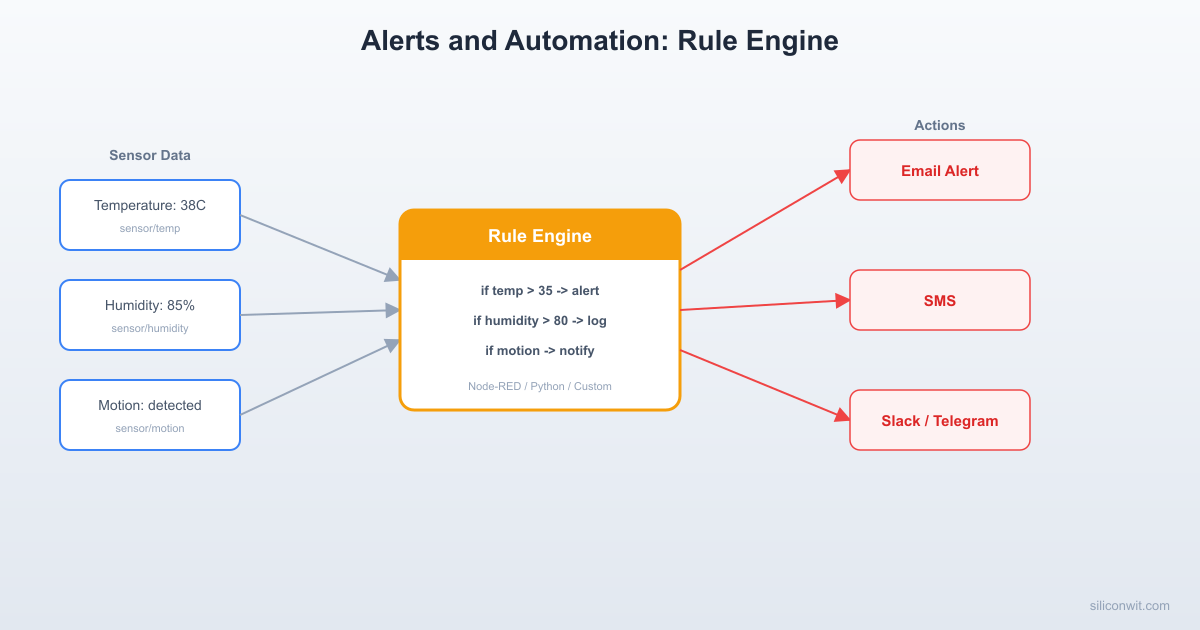
A dashboard full of charts is useless if nobody is watching it at 3 AM when a freezer compressor fails. Alerts turn passive data into active notifications that reach the right person on the right channel at the right time. In this lesson you will build a Python alert engine that evaluates rules against live MQTT data, wire up five different notification channels (email, SMS, Discord, Slack, Telegram), create visual automation flows with Node-RED, and compare all of these with the managed alert system on SiliconWit.io. #Alerts #Automation #NodeRED
Data without alerts is just noise. Consider a greenhouse with temperature and humidity sensors publishing to your MQTT broker every 10 seconds. The Grafana dashboard from Lesson 4 shows beautiful charts, but those charts only help if someone is actively looking at them. The moment you walk away from the screen, your monitoring system is blind.
Node-RED Alert Flow ────────────────────────────────────────── ┌──────────┐ ┌──────────┐ ┌─────────┐ │ MQTT In │──►│ Function │──►│ Switch │ │ (sensor/ │ │ (parse │ │ (temp │ │ temp) │ │ JSON) │ │ > 35?) │ └──────────┘ └──────────┘ └────┬────┘ │ ┌──────────┼──────────┐ ▼ ▼ ▼ ┌────────┐ ┌────────┐ ┌───────┐ │ Slack │ │ Email │ │ MQTT │ │ notify │ │ alert │ │ Out │ └────────┘ └────────┘ │(actua-│ │ tor) │ └───────┘An alert system closes that gap. It continuously evaluates incoming data against a set of rules and takes action when a condition is met: send a message, trigger an actuator, log an incident, or escalate to a second person if the first does not acknowledge within a time window.
What a good alerting system provides:
| Capability | Why It Matters |
|---|---|
| Real-time evaluation | Catches problems within seconds, not hours |
| Multiple notification channels | Reaches people wherever they are (phone, email, chat) |
| Cooldown periods | Prevents alert spam during sustained events |
| Escalation | Notifies a backup person if the primary does not respond |
| Active hours | Suppresses non-critical alerts during off-hours |
| Audit trail | Logs every alert for post-incident review |
Alert Evaluation Flow ────────────────────────────────────────── MQTT message arrives │ ▼ Parse JSON payload (temp, humidity, ts) │ ▼ ┌──────────────┐ │ temp > 35C? │──YES──► Fire threshold alert └──────┬───────┘ │ │ NO ├──► Slack message ▼ ├──► Email ┌──────────────┐ └──► Log to DB │ In cooldown? │ └──────┬───────┘ │ NO ▼ ┌──────────────┐ │ Last msg │ │ > 5 min ago? │──YES──► Fire status alert └──────────────┘ "Device offline"Not every alert is a simple threshold comparison. A robust IoT system needs several alert types to cover different failure modes.
Threshold Alerts
The most common type. Fire when a value crosses a boundary. Examples: temperature exceeds 35 C, battery voltage drops below 3.2 V, humidity exceeds 80%. Can be upper, lower, or both (band alert).
Status Alerts
Fire when a device changes state. The most important one: “device offline.” If your broker has not received a message from a device in 5 minutes, something is wrong. Also covers: device reconnected, firmware version mismatch, unexpected reboot detected via uptime counter reset.
Rate-of-Change Alerts
Fire when a value changes too quickly. A pressure sensor dropping 10 kPa in 30 seconds may indicate a pipe burst even though the absolute value is still within range. Rate alerts catch fast-moving failures that threshold alerts miss.
Inactivity Alerts
Fire when expected data stops arriving. Different from “device offline” because the device might still be connected but a specific sensor stopped publishing. Example: a soil moisture sensor that publishes every 60 seconds has not sent data in 10 minutes.
We will build an alert engine that subscribes to MQTT topics, evaluates rules defined in a JSON configuration file, tracks sustained conditions, enforces cooldown periods, and dispatches notifications through multiple channels.
┌─────────────┐ ┌──────────────┐ ┌───────────────┐│ MQTT Broker │────▶│ Alert Engine │────▶│ Notifications ││ (Mosquitto) │ │ (Python) │ │ Email/SMS/ │└─────────────┘ │ │ │ Discord/Slack/│ │ Rules JSON │ │ Telegram │ └──────────────┘ └───────────────┘Each rule is a JSON object that specifies what to watch, what condition triggers the alert, how long the condition must persist, the cooldown period, and what actions to take.
{ "rules": [ { "id": "high-temp-greenhouse", "name": "Greenhouse High Temperature", "topic": "sensors/greenhouse/temperature", "field": "temperature", "operator": ">", "threshold": 35.0, "sustained_seconds": 30, "cooldown_seconds": 300, "severity": "critical", "actions": ["email", "slack", "telegram"] }, { "id": "low-battery", "name": "Low Battery Voltage", "topic": "sensors/+/battery", "field": "voltage", "operator": "<", "threshold": 3.2, "sustained_seconds": 60, "cooldown_seconds": 600, "severity": "warning", "actions": ["email"] }, { "id": "pressure-drop", "name": "Rapid Pressure Drop", "topic": "sensors/compressor/pressure", "field": "pressure", "operator": "rate_below", "threshold": -10.0, "rate_window_seconds": 30, "sustained_seconds": 0, "cooldown_seconds": 120, "severity": "critical", "actions": ["email", "sms", "discord"] }, { "id": "device-inactive", "name": "Device Inactivity", "topic": "sensors/greenhouse/#", "field": null, "operator": "inactivity", "threshold": 600, "sustained_seconds": 0, "cooldown_seconds": 1800, "severity": "warning", "actions": ["email", "slack"] } ]}Rule fields explained:
| Field | Description |
|---|---|
id | Unique identifier for the rule |
topic | MQTT topic to subscribe to (supports wildcards) |
field | JSON key to extract from the payload (null for inactivity) |
operator | Comparison: >, <, >=, <=, ==, !=, rate_below, rate_above, inactivity |
threshold | The value to compare against |
sustained_seconds | How long the condition must persist before firing (0 = instant) |
cooldown_seconds | Minimum time between repeated alerts for the same rule |
severity | info, warning, critical |
actions | List of notification channels to use |
import jsonimport timeimport threadingfrom collections import defaultdictfrom datetime import datetime, timezoneimport paho.mqtt.client as mqtt
# --- Configuration ---MQTT_BROKER = "localhost"MQTT_PORT = 1883MQTT_USERNAME = "alert-engine"MQTT_PASSWORD = "secure-password"RULES_FILE = "rules.json"
# --- Load rules ---def load_rules(path):    with open(path, "r") as f:        data = json.load(f)    return data["rules"]
# --- State tracking ---class AlertState:    """Tracks the state of a single alert rule."""
    def __init__(self, rule):        self.rule = rule        self.condition_start = None   # When the condition first became true        self.last_alert_time = 0      # Timestamp of the last alert sent        self.last_value = None        self.last_message_time = 0    # For inactivity tracking        self.value_history = []       # For rate-of-change tracking
    def update_value(self, value, timestamp):        """Record a new value and its timestamp."""        self.last_value = value        self.last_message_time = timestamp
        # Keep a rolling window for rate-of-change calculations        window = self.rule.get("rate_window_seconds", 60)        self.value_history.append((timestamp, value))        cutoff = timestamp - window        self.value_history = [            (t, v) for t, v in self.value_history if t >= cutoff        ]
    def compute_rate(self):        """Compute the rate of change over the configured window."""        if len(self.value_history) < 2:            return 0.0        oldest_t, oldest_v = self.value_history[0]        newest_t, newest_v = self.value_history[-1]        dt = newest_t - oldest_t        if dt == 0:            return 0.0        return (newest_v - oldest_v) / dt
    def check_condition(self, now):        """        Evaluate the rule condition. Returns True if the alert        should fire, False otherwise.        """        rule = self.rule        op = rule["operator"]
        # --- Inactivity check ---        if op == "inactivity":            if self.last_message_time == 0:                return False  # Never received a message yet            silence = now - self.last_message_time            return silence >= rule["threshold"]
        # --- Rate-of-change checks ---        if op in ("rate_below", "rate_above"):            rate = self.compute_rate()            if op == "rate_below":                triggered = rate < rule["threshold"]            else:                triggered = rate > rule["threshold"]        else:            # --- Standard threshold checks ---            if self.last_value is None:                return False            v = self.last_value            t = rule["threshold"]            if op == ">":                triggered = v > t            elif op == "<":                triggered = v < t            elif op == ">=":                triggered = v >= t            elif op == "<=":                triggered = v <= t            elif op == "==":                triggered = v == t            elif op == "!=":                triggered = v != t            else:                triggered = False
        # --- Sustained condition check ---        sustained = rule.get("sustained_seconds", 0)        if triggered:            if self.condition_start is None:                self.condition_start = now            elapsed = now - self.condition_start            if elapsed >= sustained:                return True            return False        else:            # Condition cleared, reset the timer            self.condition_start = None            return False
    def should_fire(self, now):        """        Returns True if the condition is met AND the cooldown        period has elapsed since the last alert.        """        if not self.check_condition(now):            return False        cooldown = self.rule.get("cooldown_seconds", 0)        if (now - self.last_alert_time) < cooldown:            return False        return True
def mark_fired(self, now): """Record that an alert was sent.""" self.last_alert_time = now self.condition_start = None # Reset sustained timerclass AlertEngine: """Main engine: subscribes to MQTT, evaluates rules, dispatches alerts."""
def __init__(self, rules_file): self.rules = load_rules(rules_file) self.states = {} self.notifiers = {} self.lock = threading.Lock()
# Create state objects for each rule for rule in self.rules: self.states[rule["id"]] = AlertState(rule)
# Set up MQTT client self.client = mqtt.Client( mqtt.CallbackAPIVersion.VERSION2, client_id="alert-engine", protocol=mqtt.MQTTv5 ) self.client.username_pw_set(MQTT_USERNAME, MQTT_PASSWORD) self.client.on_connect = self._on_connect self.client.on_message = self._on_message
def register_notifier(self, name, notifier_func): """Register a notification channel by name.""" self.notifiers[name] = notifier_func
def _on_connect(self, client, userdata, flags, reason_code, properties): print(f"[{datetime.now().isoformat()}] Connected to broker (rc={reason_code})") # Subscribe to all topics referenced by rules topics = set(rule["topic"] for rule in self.rules) for topic in topics: client.subscribe(topic, qos=1) print(f" Subscribed to: {topic}")
def _on_message(self, client, userdata, msg): now = time.time() topic = msg.topic
# Parse JSON payload try: payload = json.loads(msg.payload.decode("utf-8")) except (json.JSONDecodeError, UnicodeDecodeError): return
with self.lock: for rule_id, state in self.states.items(): rule = state.rule
# Check if this message matches the rule topic if not self._topic_matches(rule["topic"], topic): continue
# Extract the field value field = rule.get("field") if field and field in payload: value = float(payload[field]) state.update_value(value, now) elif rule["operator"] == "inactivity": # Any message on this topic resets inactivity state.last_message_time = now else: continue
# Check if the alert should fire if state.should_fire(now): self._dispatch(state, now) state.mark_fired(now)
def _topic_matches(self, pattern, topic): """Simple MQTT topic matching with + and # wildcards.""" pattern_parts = pattern.split("/") topic_parts = topic.split("/")
for i, p in enumerate(pattern_parts): if p == "#": return True if i >= len(topic_parts): return False if p == "+": continue if p != topic_parts[i]: return False
return len(pattern_parts) == len(topic_parts)
def _dispatch(self, state, now): """Send notifications through all channels configured for this rule.""" rule = state.rule alert_data = { "rule_id": rule["id"], "rule_name": rule["name"], "severity": rule["severity"], "value": state.last_value, "threshold": rule["threshold"], "operator": rule["operator"], "timestamp": datetime.fromtimestamp( now, tz=timezone.utc ).isoformat(), }
message = ( f"[{alert_data['severity'].upper()}] " f"{alert_data['rule_name']}: " f"value={alert_data['value']}, " f"threshold={alert_data['operator']}{alert_data['threshold']}" )
print(f"[{alert_data['timestamp']}] ALERT: {message}")
for action in rule.get("actions", []): notifier = self.notifiers.get(action) if notifier: try: notifier(alert_data, message) except Exception as e: print(f" Notifier '{action}' failed: {e}")
def start(self): """Connect to broker and start processing.""" self.client.connect(MQTT_BROKER, MQTT_PORT, keepalive=60)
# Start inactivity checker in a background thread inactivity_thread = threading.Thread( target=self._inactivity_loop, daemon=True ) inactivity_thread.start()
# Blocking loop print("Alert engine running. Press Ctrl+C to stop.") self.client.loop_forever()
def _inactivity_loop(self): """Periodically check inactivity rules.""" while True: time.sleep(30) now = time.time() with self.lock: for rule_id, state in self.states.items(): if state.rule["operator"] != "inactivity": continue if state.should_fire(now): self._dispatch(state, now) state.mark_fired(now)Now we implement the functions that actually deliver notifications. Each function takes the same two arguments: alert_data (a dict with all alert details) and message (a pre-formatted string).
import smtplibfrom email.mime.text import MIMETextfrom email.mime.multipart import MIMEMultipart
# Configuration (use environment variables in production)SMTP_HOST = "smtp.gmail.com"SMTP_PORT = 587SMTP_PASSWORD = "app-specific-password"
def send_email(alert_data, message): """Send an alert email via SMTP.""" severity = alert_data["severity"].upper() subject = f"[IoT {severity}] {alert_data['rule_name']}"
# Build HTML body html = f""" <html> <body> <h2 style="color: {'red' if severity == 'CRITICAL' else 'orange'};"> {severity}: {alert_data['rule_name']} </h2> <table> <tr><td><b>Rule ID:</b></td><td>{alert_data['rule_id']}</td></tr> <tr><td><b>Value:</b></td><td>{alert_data['value']}</td></tr> <tr><td><b>Threshold:</b></td> <td>{alert_data['operator']}{alert_data['threshold']}</td></tr> <tr><td><b>Time:</b></td><td>{alert_data['timestamp']}</td></tr> </table> </body> </html> """
msg = MIMEMultipart("alternative") msg["Subject"] = subject msg["From"] = SMTP_USER msg["To"] = RECIPIENT msg.attach(MIMEText(message, "plain")) msg.attach(MIMEText(html, "html"))
with smtplib.SMTP(SMTP_HOST, SMTP_PORT) as server: server.starttls() server.login(SMTP_USER, SMTP_PASSWORD) server.sendmail(SMTP_USER, RECIPIENT, msg.as_string())
print(f" Email sent to {RECIPIENT}")import requests
# Twilio credentials (use environment variables in production)TWILIO_ACCOUNT_SID = "ACxxxxxxxxxxxxxxxxxxxxxxxxxxxxxxxx"TWILIO_AUTH_TOKEN = "your_auth_token"TWILIO_FROM_NUMBER = "+1234567890"RECIPIENT_NUMBER = "+0987654321"
def send_sms(alert_data, message): """Send an SMS alert via the Twilio API.""" url = ( f"https://api.twilio.com/2010-04-01/" f"Accounts/{TWILIO_ACCOUNT_SID}/Messages.json" )
body = ( f"IoT Alert [{alert_data['severity'].upper()}]\n" f"{alert_data['rule_name']}\n" f"Value: {alert_data['value']}\n" f"Threshold: {alert_data['operator']}{alert_data['threshold']}" )
resp = requests.post( url, data={ "From": TWILIO_FROM_NUMBER, "To": RECIPIENT_NUMBER, "Body": body, }, auth=(TWILIO_ACCOUNT_SID, TWILIO_AUTH_TOKEN), )
if resp.status_code == 201: print(f" SMS sent to {RECIPIENT_NUMBER}") else: print(f" SMS failed: {resp.status_code} {resp.text}")import requests
# Create a webhook in Discord: Server Settings -> Integrations -> WebhooksDISCORD_WEBHOOK_URL = "https://discord.com/api/webhooks/YOUR_WEBHOOK_ID/YOUR_WEBHOOK_TOKEN"
def send_discord(alert_data, message): """Send an alert to a Discord channel via webhook.""" severity = alert_data["severity"].upper()
# Color codes: red for critical, orange for warning, blue for info color_map = {"CRITICAL": 0xFF0000, "WARNING": 0xFF8C00, "INFO": 0x0099FF} color = color_map.get(severity, 0x808080)
payload = { "embeds": [ { "title": f"{severity}: {alert_data['rule_name']}", "color": color, "fields": [ {"name": "Value", "value": str(alert_data["value"]), "inline": True}, {"name": "Threshold", "value": f"{alert_data['operator']}{alert_data['threshold']}", "inline": True}, {"name": "Rule ID", "value": alert_data["rule_id"], "inline": True}, {"name": "Time", "value": alert_data["timestamp"], "inline": False}, ], } ] }
resp = requests.post(DISCORD_WEBHOOK_URL, json=payload)
if resp.status_code == 204: print(" Discord notification sent") else: print(f" Discord failed: {resp.status_code} {resp.text}")import osimport requests
# Create an Incoming Webhook in your Slack workspace:# https://api.slack.com/messaging/webhooksSLACK_WEBHOOK_URL = os.getenv("SLACK_WEBHOOK_URL", "")
def send_slack(alert_data, message): """Send an alert to a Slack channel via Incoming Webhook.""" severity = alert_data["severity"].upper()
# Slack Block Kit message payload = { "blocks": [ { "type": "header", "text": { "type": "plain_text", "text": f"{'🔴' if severity == 'CRITICAL' else '🟡'} IoT Alert: {alert_data['rule_name']}", }, }, { "type": "section", "fields": [ {"type": "mrkdwn", "text": f"*Severity:*\n{severity}"}, {"type": "mrkdwn", "text": f"*Value:*\n{alert_data['value']}"}, {"type": "mrkdwn", "text": f"*Threshold:*\n{alert_data['operator']}{alert_data['threshold']}"}, {"type": "mrkdwn", "text": f"*Time:*\n{alert_data['timestamp']}"}, ], }, {"type": "divider"}, { "type": "context", "elements": [ {"type": "mrkdwn", "text": f"Rule ID: `{alert_data['rule_id']}`"}, ], }, ] }
resp = requests.post(SLACK_WEBHOOK_URL, json=payload)
if resp.status_code == 200: print(" Slack notification sent") else: print(f" Slack failed: {resp.status_code} {resp.text}")import requests
# 1. Message @BotFather on Telegram to create a bot and get a token# 2. Send a message to your bot, then fetch the chat_id from:# https://api.telegram.org/bot<TOKEN>/getUpdatesTELEGRAM_BOT_TOKEN = "1234567890:ABCdefGHIjklMNOpqrsTUVwxyz"TELEGRAM_CHAT_ID = "987654321"
def send_telegram(alert_data, message): """Send an alert via Telegram Bot API.""" severity = alert_data["severity"].upper()
text = ( f"<b>{'🔴' if severity == 'CRITICAL' else '🟡'} IoT Alert</b>\n\n" f"<b>Rule:</b> {alert_data['rule_name']}\n" f"<b>Severity:</b> {severity}\n" f"<b>Value:</b> {alert_data['value']}\n" f"<b>Threshold:</b> {alert_data['operator']}{alert_data['threshold']}\n" f"<b>Time:</b> {alert_data['timestamp']}\n" f"<b>Rule ID:</b> <code>{alert_data['rule_id']}</code>" )
url = f"https://api.telegram.org/bot{TELEGRAM_BOT_TOKEN}/sendMessage"
resp = requests.post( url, json={ "chat_id": TELEGRAM_CHAT_ID, "text": text, "parse_mode": "HTML", }, )
if resp.status_code == 200: print(" Telegram notification sent") else: print(f" Telegram failed: {resp.status_code} {resp.text}")from alert_engine import AlertEnginefrom notifiers.email_notifier import send_emailfrom notifiers.sms_notifier import send_smsfrom notifiers.discord_notifier import send_discordfrom notifiers.slack_notifier import send_slackfrom notifiers.telegram_notifier import send_telegram
engine = AlertEngine("rules.json")
# Register all notification channelsengine.register_notifier("email", send_email)engine.register_notifier("sms", send_sms)engine.register_notifier("discord", send_discord)engine.register_notifier("slack", send_slack)engine.register_notifier("telegram", send_telegram)
# Start the engine (blocks forever)engine.start()paho-mqtt>=2.0.0requests>=2.31.0You do not need real sensors to test. Open a second terminal and publish test messages with mosquitto_pub:
# Publish a temperature above the 35 C thresholdmosquitto_pub -h localhost -u test -P testpass \ -t "sensors/greenhouse/temperature" \ -m '{"temperature": 37.5, "humidity": 65.2}'# Publish every 5 seconds for 60 seconds to trigger sustained alertsfor i in $(seq 1 12); do mosquitto_pub -h localhost -u test -P testpass \ -t "sensors/greenhouse/temperature" \ -m "{\"temperature\": 38.$(($RANDOM % 10)), \"humidity\": 70.1}" sleep 5doneYou should see the alert engine print the alert and dispatch notifications after the sustained period elapses.
If you do not want to run your own alert engine, SiliconWit.io provides a fully managed alert system. It supports all the alert types we discussed (threshold, status, geofence, inactivity) and delivers notifications via email, SMS, and webhooks. It also includes escalation chains, cooldown periods, and active-hours scheduling out of the box.
Log in to your SiliconWit.io dashboard and navigate to the device that is publishing sensor data.
Go to Alerts. Click the Alerts tab in the left sidebar, then click Create Alert.
Configure the trigger. Select the data stream (e.g., temperature), set the operator to “greater than,” and set the threshold to 35. Set the sustained duration to 30 seconds.
Set notification channels. Check the boxes for email and/or webhook. For webhooks, paste the URL of your Slack, Discord, or custom endpoint. SiliconWit.io will POST a JSON payload whenever the alert fires.
Configure cooldown and active hours. Set cooldown to 5 minutes so you do not get repeated notifications. Optionally restrict the alert to business hours if it is non-critical.
Save and test. Click Save. Publish a test value above the threshold from your device or with mosquitto_pub. You should receive a notification within seconds.
When to use SiliconWit.io alerts vs. a custom engine:
| Scenario | Recommended Approach |
|---|---|
| Quick prototype, few devices | SiliconWit.io (zero setup) |
| Complex custom logic, many rules | Custom Python engine |
| Visual automation with hardware actions | Node-RED |
| Alerts tied to dashboard panels | Grafana alerting |
Node-RED is an open-source, browser-based flow editor built on Node.js. You build automation logic by wiring together “nodes” on a canvas. Each node performs one task: receive an MQTT message, evaluate a condition, format a payload, send an HTTP request. The visual approach makes it fast to prototype and easy for non-programmers to understand.
# Requires Node.js 18 or latersudo npm install -g --unsafe-perm node-red
# Start Node-REDnode-red
Node-RED will be available at http://localhost:1880.
docker run -d \ --name node-red \ --restart unless-stopped \ -p 1880:1880 \ -v node_red_data:/data \ nodered/node-red:latest# The official install script handles everythingbash <(curl -sL https://raw.githubusercontent.com/node-red/linux-installers/master/deb/update-nodejs-and-nodered)
# Enable as a service so it starts on bootsudo systemctl enable noderedsudo systemctl start noderedBefore building a flow, here are the nodes you will use most often.
| Node | Category | Purpose |
|---|---|---|
| mqtt in | Network | Subscribe to an MQTT topic and receive messages |
| mqtt out | Network | Publish a message to an MQTT topic |
| function | Function | Write JavaScript to transform or evaluate data |
| switch | Function | Route messages based on conditions (like an if/else) |
| change | Function | Set, change, or delete message properties |
| http request | Network | Make HTTP GET/POST requests (webhooks, APIs) |
| Social | Send email via SMTP | |
| debug | Output | Print messages to the debug sidebar |
| inject | Input | Manually trigger a flow for testing |
| delay | Function | Throttle, rate-limit, or delay messages |
We will build a flow that does the following:
sensors/greenhouse/temperatureDrag an mqtt in node onto the canvas and configure it:
| Property | Value |
|---|---|
| Server | localhost:1883 (add credentials in the server config) |
| Topic | sensors/greenhouse/temperature |
| QoS | 1 |
| Output | parsed JSON object |
Connect a function node after the mqtt-in node. This node extracts the temperature and adds a flag indicating whether the threshold is exceeded.
// Extract temperature from the incoming MQTT payloadvar temp = msg.payload.temperature;
if (temp === undefined || temp === null) {    node.warn("No temperature field in payload");    return null;  // Drop the message}
// Attach the raw value and evaluation resultmsg.temperature = temp;msg.threshold = 35;msg.exceeded = (temp > 35);
return msg;Connect a switch node after the function node. Configure it to route on the property msg.exceeded:
| Output | Condition |
|---|---|
| Output 1 | msg.exceeded is true |
| Output 2 | msg.exceeded is false |
This gives you two output wires: one for the “alert” path and one for the “normal” path.
From Output 1 of the switch node, wire two parallel paths:
Path A: Slack Notification
Add a function node to format the Slack message:
msg.payload = { "text": "🔴 *Greenhouse Alert*: Temperature is " + msg.temperature + "°C (threshold: 35°C). " + "Fan has been activated."};msg.headers = { "Content-Type": "application/json" };msg.url = "https://hooks.slack.com/services/YOUR/WEBHOOK/URL";return msg;Connect this to an http request node set to POST.
Path B: Fan ON Command
Add a change node that sets msg.payload to {"command": "fan_on", "speed": 100}, then connect it to an mqtt out node publishing to actuators/greenhouse/fan.
From Output 2 of the switch node, add a change node that sets msg.payload to {"command": "fan_off"}, then connect it to another mqtt out node publishing to actuators/greenhouse/fan.
Add debug nodes to the output of each path so you can see messages flowing through the system in the Node-RED debug sidebar.
Once your flow is working, click the menu (three horizontal lines in the top right), then Export to get the JSON representation. Here is the complete flow:
[ { "id": "mqtt_in_1", "type": "mqtt in", "name": "Greenhouse Temp", "topic": "sensors/greenhouse/temperature", "qos": "1", "datatype": "json", "broker": "broker_config", "wires": [["func_eval"]] }, { "id": "func_eval", "type": "function", "name": "Evaluate Threshold", "func": "var temp = msg.payload.temperature;\nif (temp === undefined) return null;\nmsg.temperature = temp;\nmsg.threshold = 35;\nmsg.exceeded = (temp > 35);\nreturn msg;", "wires": [["switch_1"]] }, { "id": "switch_1", "type": "switch", "name": "Temp > 35?", "property": "exceeded", "rules": [ {"t": "true"}, {"t": "false"} ], "wires": [ ["func_slack", "change_fan_on"], ["change_fan_off"] ] }, { "id": "func_slack", "type": "function", "name": "Format Slack", "func": "msg.payload = {text: 'Greenhouse Alert: Temp=' + msg.temperature + 'C'};\nmsg.headers = {'Content-Type':'application/json'};\nreturn msg;", "wires": [["http_slack"]] }, { "id": "http_slack", "type": "http request", "name": "Send Slack", "method": "POST", "url": "https://hooks.slack.com/services/YOUR/WEBHOOK/URL", "wires": [["debug_slack"]] }, { "id": "change_fan_on", "type": "change", "name": "Fan ON", "rules": [ {"t": "set", "p": "payload", "to": "{\"command\":\"fan_on\",\"speed\":100}", "tot": "json"} ], "wires": [["mqtt_out_fan"]] }, { "id": "change_fan_off", "type": "change", "name": "Fan OFF", "rules": [ {"t": "set", "p": "payload", "to": "{\"command\":\"fan_off\"}", "tot": "json"} ], "wires": [["mqtt_out_fan"]] }, { "id": "mqtt_out_fan", "type": "mqtt out", "name": "Fan Command", "topic": "actuators/greenhouse/fan", "qos": "1", "broker": "broker_config", "wires": [] }, { "id": "debug_slack", "type": "debug", "name": "Slack Response", "wires": [] }, { "id": "broker_config", "type": "mqtt-broker", "name": "Local Mosquitto", "broker": "localhost", "port": "1883", "credentials": { "user": "nodered", "password": "nodered-pass" } }]To import this flow: open Node-RED, click the menu, Import, paste the JSON, and click Import. Update the broker credentials and Slack webhook URL to match your setup.
Simple threshold alerts cover the basics, but production systems need more sophisticated patterns to avoid false positives and handle edge cases.
A sensor reading that hovers around the threshold will cause the alert to fire and clear repeatedly, sending a flood of notifications. Hysteresis solves this by using two thresholds: a high threshold to trigger the alert and a lower threshold to clear it.
class HysteresisAlert:    """    Alert with separate trigger and reset thresholds.    Trigger at 35 C, clear at 33 C. This prevents flapping    when the temperature oscillates around 35 C.    """
    def __init__(self, trigger_threshold, reset_threshold):        self.trigger_threshold = trigger_threshold        self.reset_threshold = reset_threshold        self.is_active = False
    def evaluate(self, value):        if not self.is_active and value > self.trigger_threshold:            self.is_active = True            return "TRIGGERED"        elif self.is_active and value < self.reset_threshold:            self.is_active = False            return "CLEARED"        return "NO_CHANGE"
# Example usagealert = HysteresisAlert(trigger_threshold=35.0, reset_threshold=33.0)
readings = [33, 34, 35.1, 35.5, 34.8, 35.2, 33.5, 32.9, 33.1]for r in readings:    result = alert.evaluate(r)    if result != "NO_CHANGE":        print(f"  Temp={r}C -> {result}")
Output:
Temp=35.1C -> TRIGGERED Temp=32.9C -> CLEAREDWithout hysteresis, the values 35.1, 34.8, 35.2 would cause trigger, clear, trigger in rapid succession. With hysteresis, the alert triggers once at 35.1 and does not clear until the temperature drops below the reset threshold of 33 C.
A dead-band is similar to hysteresis but symmetrical. It defines a “no action” zone around a setpoint. This is common in HVAC systems where you want the heater to turn on below 20 C and the cooler to turn on above 25 C, with a dead band between 20 and 25 where neither runs.
class DeadBandController:    """    Dead-band controller for HVAC-style automation.    Heater ON below low_threshold, cooler ON above high_threshold,    both OFF in the dead band between them.    """
    def __init__(self, low_threshold, high_threshold):        self.low = low_threshold        self.high = high_threshold        self.state = "idle"  # "heating", "cooling", or "idle"
    def evaluate(self, value):        if value < self.low:            new_state = "heating"        elif value > self.high:            new_state = "cooling"        else:            new_state = self.state  # Stay in current state (dead band)
changed = (new_state != self.state) self.state = new_state return self.state, changedSome automations are time-based, not data-based. Node-RED’s inject node can be configured with a cron expression to trigger flows on a schedule. Common examples:
| Schedule | Use Case |
|---|---|
| Every day at 06:00 | Turn on greenhouse irrigation |
| Every 15 minutes | Request a status report from all devices |
| Monday 09:00 | Generate and email a weekly sensor summary |
| Sunset (calculated) | Turn on outdoor lights |
In Python, use the schedule library or system cron jobs:
import scheduleimport timeimport paho.mqtt.client as mqtt
client = mqtt.Client(mqtt.CallbackAPIVersion.VERSION2)client.connect("localhost", 1883)
def morning_irrigation():    """Turn on the irrigation system every morning."""    client.publish(        "actuators/greenhouse/irrigation",        '{"command": "start", "duration_minutes": 30}',        qos=1    )    print("Irrigation started (30 min)")
def request_status():    """Ask all devices to report their status."""    client.publish(        "commands/all/status",        '{"request": "report"}',        qos=1    )
# Schedule tasksschedule.every().day.at("06:00").do(morning_irrigation)schedule.every(15).minutes.do(request_status)
while True: schedule.run_pending() time.sleep(1)For more complex if-then logic, Node-RED’s switch node supports multiple conditions chained together. You can also nest function nodes for compound conditions that are difficult to express with the visual switch node.
// Only alert if temperature is high AND humidity is low// (high temp + low humidity = fire risk in a warehouse)var temp = msg.payload.temperature;var humidity = msg.payload.humidity;
if (temp > 40 && humidity < 20) {    msg.alert = "FIRE_RISK";    msg.payload = {        text: "Fire risk: temp=" + temp + "C, humidity=" + humidity + "%"    };    return msg;}
return null; // Drop message if condition not metIf you already have Grafana dashboards from Lesson 4, you can add alert rules directly to your dashboard panels. This is convenient because the alert definition lives alongside the visualization.
Open the panel you want to alert on (e.g., a temperature time-series chart).
Click the panel title and select Edit.
Go to the Alert tab and click Create alert rule from this panel.
Define the condition. Select the query (your InfluxDB query for temperature), set the reducer to “last” (or “avg” for smoothing), and set the threshold. For example: “WHEN last() OF query(A) IS ABOVE 35.”
Set the evaluation interval. How often Grafana checks the condition. Every 10 seconds is reasonable for real-time monitoring.
Set the “for” duration. This is equivalent to our “sustained_seconds” in the Python engine. A “for” duration of 30 seconds means the condition must be true for 30 consecutive evaluations before the alert fires.
Configure contact points. Go to Alerting > Contact Points in the Grafana sidebar. Add a contact point for each notification channel (email, Slack webhook, Discord webhook, etc.). Then assign the contact point to your alert rule.
Save the dashboard.
Grafana alerting is powerful but has constraints you should know about.
| Limitation | Impact |
|---|---|
| Tied to dashboard queries | Cannot alert on raw MQTT; data must be in the database first |
| Evaluation interval minimum | 10 seconds (not truly real-time) |
| Limited logic | Simple threshold and range conditions; complex compound rules require recording rules in InfluxDB or a separate engine |
| Notification templates | Less flexible than custom Python formatters |
| Stateful only within Grafana | If Grafana restarts, pending alert states may reset |
For simple “value above X” alerts, Grafana works well. For anything more complex, use the Python engine or Node-RED.
Custom Python Engine
Best for: Complex rules, custom logic, large-scale deployments. Full control over every aspect: rule evaluation, notification formatting, state management, database logging. Requires you to write and maintain the code, handle restarts, and manage dependencies. Most flexible but most effort.
Node-RED
Best for: Visual prototyping, hardware automation, non-programmer teams. Drag-and-drop flow editor with hundreds of community nodes. Great for wiring MQTT inputs to HTTP outputs, toggling relays, and building dashboards. Less suited for complex stateful logic or very large rule sets.
SiliconWit.io Alerts
Best for: Quick setup, managed infrastructure, small to medium deployments. Zero infrastructure to maintain. Alerts, dashboards, and device management in one platform. Supports threshold, status, geofence, and inactivity alerts with email, SMS, and webhook notifications. Limited customization compared to a self-hosted engine.
Grafana Alerting
Best for: Teams already using Grafana dashboards, alert-on-chart workflows. Alerts are defined alongside visualizations. Good for threshold and range conditions on time-series data. Requires data to already be in a supported database (InfluxDB, Prometheus, etc.). Not designed for real-time MQTT-driven automation.
Decision matrix:
| Criterion | Python Engine | Node-RED | SiliconWit.io | Grafana |
|---|---|---|---|---|
| Setup time | Slow | Medium | Fast | Medium |
| Flexibility | High | Medium | Low | Low |
| Real-time MQTT | Yes | Yes | Yes | No |
| Hardware actuation | Manual | Built-in | Via webhooks | No |
| Visual editor | No | Yes | Yes | Partial |
| Maintenance burden | High | Medium | None | Medium |
| Scalability | High | Medium | High | Medium |
| Cost | Free | Free | Free tier / paid | Free |
For this course, we recommend starting with SiliconWit.io for quick wins, then building the Python engine when you need custom logic, and using Node-RED when your automation involves physical actuators like fans, valves, or relays that respond to MQTT commands.
Build a complete alert system using the Python engine from this lesson.
Requirements:
rules.json: one threshold alert, one rate-of-change alert, and one inactivity alertmosquitto_pubDeliverables:
rules.json fileBuild a Node-RED flow that monitors two sensors and controls two actuators.
Requirements:
sensors/greenhouse/temperature and sensors/greenhouse/soil_moistureactuators/greenhouse/fan to turn on the fanactuators/greenhouse/irrigation to start watering for 10 minutesDeliverables:
Set up alerts on the SiliconWit.io platform for your sensor data.
Requirements:
Deliverables:
Create a Grafana alert rule and simulate an escalation workflow.
Requirements:
sustained_secondsDeliverables:
Next lesson: Device Security, TLS, and Provisioning. You will generate X.509 certificates, configure mutual TLS on your MQTT connections, and build a device provisioning workflow that assigns unique identities to each node in your IoT network.
Comments